AE Script: Easy Set Matte Setup


So this little tweet about my go-to method for highlighting text got some attention:

It might not come as a surprise that I also have a script to make this even easier.

Download MatteLock.jsx

Save this to your scripts folder, or into a KBar button. Then follow these steps:

  1. Select the layer to apply the matte to
  2. Select the layer to use as the source of the matte.
    Optional: Hold ALT/Option to invert the matte.
    -OR-
    Optional: Hold Shift to apply inverted matte to both layers using eachother as the source.
  3. Run script

Note that by default, the script will simply apply the Set Matte effect on the first layer. Holding Shift and running the script is what creates the magic this post is all about.

And, if you like this you might like some of the other After Effects tools I’ve created.

FX Console + KBar

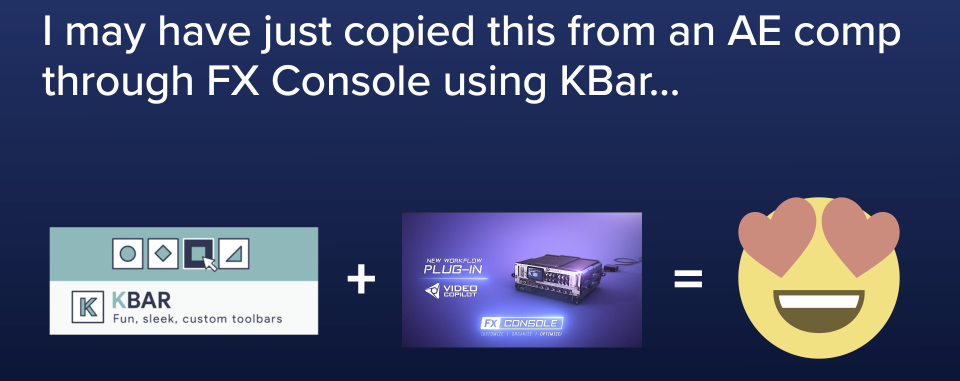
FX Console is one of those now indispensable enhancements for After Effects. In addition to easily searching for effects and presets to apply, it also serves as a gallery for taking, comparing, and exporting screen shots of your comps. KBar is another great extension to create custom toolbars and buttons to launch scripts, apply expressions and more. What if these two could work together? FX Console comes with a script panel to launch the snapshot features (screenshot, gallery, export) and preferences. With a little hacking around (and the blessing of Andrew Kramer) I was able to create a single script to put those features right into KBar buttons!

How to use it…

Open up KBar settings and create a new script button. Browse to the fxConsoleKBar.jsx script.

The default function will take a screenshot. But you can also supply the following arguments in the button setup to change the function (no quotes):

nothing : Default, takes screenshot
screenshot : Takes screenshot
gallery : Opens gallery
export : Export current frame
preferences : Opens preferences

You can make several buttons all pointing to the same script file with different arguments. Or you can setup keyboard modifiers if you just want a single button to do many things (thanks Tomas Šinkūnas). Take the following example:

alt: gallery, shift: export, cmd: preferences

With this setup, a normal button press will take a screenshot, alt press will open the gallery, shift press will bring up export options, and cmd (ctrl for windows) will open up preferences.

alt (uses option key on macOS)
cmd (uses the control key on Windows)
shift
alt+cmd
shift+alt
shift+cmd

Download

So here you go. Download the script and hook up FX Console to KBar!

Download fxConsoleKBar.jsx

More Tools

I have several other After Effects tools available, including a bundle of presets and a better way to copy/paste/reverse keyframes.

Curvy Connector AE Preset


The latest version of After Effects was released today (v15.0), and with it a slew of new features. One of those features allowed me to make the Curvy Connector preset!

Easily connect two layers in an After Effects comp with a controllable “S” curve. How controllable? Take a look at the controller view to the right.

The Curvy Connector preset is part of my new preset pack: Conigs Mixtape. The pack currently contains 10 presets and is available for $10. Math wizards might notice that’s only $1 per preset. And once you buy the pack, you’ll get updates and additions for free. But for each new preset added to the pack in the future, the new purchase price will go up by $1. So grab it now!

But because the AE community is awesome, I’m giving the initial version of Curvy Connector away for free (updates will live in Conigs Mixtape).

Download Curvy Connector (v15.0) -or- See more info on Conigs Mixtape

AE Preset – Measurements

There’s been many times where I needed a matching rectangle behind a text layer, or even just need to know a shape layer’s size and center. I got tired of remember the exact usage of the sourceRectAtTime() expression, especially getting the time right. So I made this preset.

Apply conigs_Measurements.ffx to a text or shape layer, and it will give you the Size (width, height), Center (x, y), Top-Left, and Bottom-Right coordinates, with the option for padding. It can get the measurements at the current time, or sample from a set time (maybe for an animated text layer where you want the box to stay static). It also has switches to take into account the scaling of the layer and to give you coordinates in composition space instead of relative to the layer.

Please note this requires AE 13.2 (CC2014) or later as the sourceRectAtTime() expression was first introduced in that version.

What you do with these numbers is up to you, but hopefully this will make it a little easier to rig up elements to another layer’s size.

Measurements is part of the Conigs Mixtape preset pack.

Download Conigs Mixtape today!

AE Script – Move Selected Layer Group

Sometimes you want to select a group of layers in After Effects, and just move them all to the current time indicator and keep their relative timing. So you think ”I’ll just hit [ and move them all!” Only then you’re immediately hitting undo as you notice all the layers in-points moved to the CTI, erasing your carefully crafted timing. I got tired of that a long time ago and wrote a little script for my ft-toolbar setup. The topic recently came up on Twitter so I thought I’d share it.

Download below and set to an ft-toolbar button, or set a keyboard shortcut on macOS. Open up System Preferences: Keyboard: Shortcuts. Then click on App Shortcuts and add After Effects. Then you can type in ‘MoveSelectedLayerGroup.jsx’ and assign a shortcut.

MoveSelectedLayerGroup.zip

Expression: oscillate()

Update: Oscillate is now a preset and part of Conigs Mixtape! Download it today!

There’s many occasions I just need a certain parameter in After Effects to go between two values. There’s several ways to do this (including keyframing), but one of the go-to methods is using the Math.sin() expression to get a nice sine wave. But for whatever reason, I always end up reminding myself the correct way to write out Math.sin( Math.PI * 2 * time * frequency ) * amplitude in my expression. I also wanted a bit more options. Sure cosine is easy (Math.cos()) but what about a triangle wave? Or Sawtooth?

So I wrote up a function to paste into an expression to give me many options. The image above shows some example usage, but here’s the complete rundown…

oscillate("wave-type", frequency, amplitude, time)

"wave-type"

A string or integer defining the type of wave to produce. Why the option to use numbers? Maybe you want to use some other code to determine the type of wave. Using a number just makes that easier. In general use, the strings are just easier to remember.

  • "sin" or "sine" or 1 (default)
  • "cos" or "cosine" or 2
  • "square" or 3
  • "saw" or "sawtooth" or 4
  • "tri" or "triangle" or 5

frequency

Number of full waves per second. Defaults to 1.

amplitude

The height of the wave above or below 0. Defaults to 1.

time

The value to drive the wave. Defaults to time, but it could also use any other variable. Consider using the layer’s x position to drive the function on its y position.

Defaults

All the parameters are optional in the function. Using just oscillate() will give you a sine wave with a frequency and amplitude of 1 over time. Or fill in all the parameters to get exactly what you want. However, the parameters must be given in order. So if you just want to change the amplitude, you’ll need to include the wave-type and frequency before it.

The Code

And finally, here’s the code. Paste this into your expression (usually at the end), and you can call oscillate() to get a nice oscillation.

/*
oscillate(wave-type, frequency, amplitude, time)

Returns value along time axis of different wave types or false if error.
All arguments are optional. Function defaults to Sine wave over time with frequency and amplitude of 1.
*/
function oscillate(w,f,a,t) {
    //Defaults
    if(!arguments[0]) w="sin";
    if(!arguments[1]) f=1;
    if(!arguments[2]) a=1;
    if(!arguments[3]) t=time;

    try {
        w=w.toString().toLowerCase();
        x=t*f;  

        switch(w){
            case "1": case "sin": case "sine":
                return Math.sin(2*Math.PI*x)*a;
            case "2": case "cos": case "cosine":
                return Math.cos(2*Math.PI*x)*a;
            case "3": case "square":
                return Math.floor(Math.sin(2*Math.PI*x))*a*2+a;
            case "4": case "saw": case "sawtooth":
                x=x*f+f/2;x<0?adj=a:adj=-a;
                return ((x%f)/f)*a*2+adj;
            case "5": case "tri": case "triangle":
                x=x*f-f/4;x<0?adj=a:adj=-a;
                return (Math.abs(((x%f)/f)*a*2+adj)-a/2)*2;
            default:
                return false;
        }
    } catch(e) {return false}
}

After Effects: A Better Bounce

A lot of bounce expressions rely on either setting parameters like frequency and decay, leading to guess work for when bounces will end or how long they’ll last. Or the expression will settle the bounce on the last keyframe, giving you no real idea how fast the object will move before the bounce. This always bothered me.

Then this week on the Motion Design Slack group, someone was asking about getting bounce expressions to behave more intuitively. So I rolled up my sleeve and got to modifying an existing expression for inertial bounce (actually elastic). Here’s the resulting code:

bounces    = 4;     //total number of bounces
duration   = .25;   //duration of each bounce in seconds
amp        = .05;   //multiplier for incoming velocity used in bounce
decay      = 3;     //exponential decay of bounce height

n=0;
if(numKeys>0){n=nearestKey(time).index;if(key(n).time>time){n--;}}
n==0?t=0:t=time-key(n).time;
freq=1/duration;
mult = (bounces-Math.floor(t*freq))/bounces;
if (n>0 && mult>0) {
    v=velocityAtTime(key(n).time-0.001)*amp; //velocity to use
    b=Math.abs(Math.sin(freq*t*Math.PI))*Math.pow(mult,decay); //bounce calculation
    value-v*b;
} else {value;}

Now this won’t be physically accurate. Each resulting bounce would really be shorter in time as well. If that’s what you’re looking for, Dan Eberts has a physically accurate expression. And there’s many other bounce tools like After Ease, Ease and Wizz, and Duik. However, this will give you a specific number of bounces, a set time for each bounce, and take incoming speed from keyframes for the object. This works great as an ft-toolbar button or a Text Expander snippet.

Interlacing: A Twitter Conversation

It all started with this tweet:

the sooner interlaced video dies a horrible death, the better.less than a minute ago via web

Once I retweeted that, it elicited the following response:

@dan_hin @conigs |W|h|a|t|s w|r|o|n|g w|i|t|h i|n|t|e|r|l|a|c|i|n|g|?|less than a minute ago via Twitter for Mac

@vonherwig @dan_hin |h|W|t|a|w s|o|r|g|n i|w|h|t n|i|e|t|l|r|c|a|n|i|?|g| #WrongFieldOrderless than a minute ago via Echofon

@conigs @dan_hin Looks fine on my Trinitron. *shrugs*less than a minute ago via Twitter for Mac

Something New…

ML-Banner

If you’re a motion designer, you’ll be interested in something new I’m helping with. A few of us are starting something called The Motion League. More details will come in the next couple weeks.